26 February 2011

Berso at Litrato | Feb 27

  
Moonlight fading
with the colors 
of the hyacinth...

Quaint hearts longing
for the night to end. 


Berso at Litrato
27 February 2011


24 February 2011

Photo of the Day | Feb 25


Freedom of Youth
Photo of the Day | Feb 25

Happy Accidents. This kind of photo is what I call a happy accident... those moments when I sometimes snap a random capture, ....unintentional, coincidental and with just plain luck, but the results are amazing and surprisingly beautiful photographs. Just like this photo of a young girl diving into the river from our recent trip in Biak-na-Bato National Park in San Miguel, Laguna. I actually have 2 shots of her while in mid-air. The first one is sharp and clear, but for obvious reason, I like this one much better. Like pencil strokes, the background and subject move into a canvas abstract. 


21 February 2011

Photography Tips of The Week #2

Selective Focus and Depth of Field


There are many ways to make your subject stand out in your photographs. You can use contrasting colors, textures, dimensions, change your view point, or you can just simply separate it from the background with selective focusing. Selective focus is a process of carefully controling the camera focus on your subject alone and completely ignoring or blurring the background. It's a creative manipulation of the Depth of Field in your photographs.


Depth of Field, for those who are not yet familiar, is the focal zoning from the foreground to the background, that indicates the sharpness of the subject(s) in your frame. It can be controlled with these three (3) factors, the aperture, the distance of your camera to the subject and the focal length of the lens. Through the aperture control, using a bigger opening (f-stop, ex. f/1.2 - f/2.8) can create a "Shallow Depth of Field", wherein, only the object of your focus remains sharp, and the rest of the background is blurred. While using a smaller opening (ex. f/8 - f/22) can result to a "Deep Depth of Field" wherein, the majority in the image from foreground to the background, is sharp. 


The distance between your camera and the subject can also determine your depth of field. If you stand closer to the subject, your focus will be concentrated more on it than the background, creating a shallow DoF. If you want a sharper image, move a little back from your subject to increase your DoF. 
  
Likewise, if you use a longer focal length, like telephotos and zooms (ex. 100mm above), the area in your focus is "compressed", thus, isolating your subject from the background. But it is not always the case, it still depends on your settings and distance of focus. Results  may vary with different lens and focal lengths. For example, a small f-stop (f/11) on a 35-70mm zoom lens, set on 35mm and focused on a 9 feet distance, can result to a Deep DoF with a sharp image from 6-20ft. On the other hand, with the same f-stop and distance but focal length set to 70mm, the DoF is relatively shallower with only 8-11ft sharp image. 


One great way to maximize the effect of focus and sharpness in your images is by understanding the Hyperfocal Distance of your lens.The hyperfocal distance is basically a point in which your focus and everything from that point to infinity will be sharp. Different lens, either prime or with varying focal lengths, have different corresponding hyperfocal distance. Mastering this can make outstanding landscapes with really sharp image all throughout the frame. A great example are the works of Allan Barredo (view them on his blog, Lantaw, http://lantaw.blogspot.com/ ). I'll see if I can also grab a chart and share it with you some other time.


Understanding Depth of Field and mastering the 
control of it can really help you in creating great quality images. It's what determines the output or the look that you want in your photographs. It's also a useful means to direct the viewer's eyes in the flow that you want. So it's very important to maintain a separation of focus with your subject and the background. Needless to say, that you're subject must be easily identified from the background through the difference in sharpness and focus. No matter how good a composition is, if the focus is off, then it's just a wasted shot. 
  
 Most of my photos, especially close-ups and macros, are done with selective focusing. It's what helps me create the mood that I wanted in my images. Even in my portraits and architectural photos, selective focusing is a great tool that creates emphasis and perspective on my every captures. Of course, it would be even better with the use of a good set of lens (fast lens with bigger aperture), and a creative viewpoint to capture that unique work of art. 


 You can also use selective focusing in enhancing  or isolating a portion of your subject. I normally use it to emphasize the eyes of the models in my portraits. Creating a single directional flow for the viewers and captivating them, making them linger on my subject.


Thanks again for your time... and see you next week on another Photography Tips!

Have a great week, everyone!


17 February 2011

A Time for Zen...


A Time for Zen...

We all have our dreams of a peaceful and blissful life.
We long for it... worked hard for it... even if it's nearly impossible to achieve it.

Amidst the chaos of the world and the uncertainty of life,
That single hope of freedom can drive us towards a raging storm.

But I'm not looking for an enlightened Nirvana... or a magical Shangri-La.
I just need a time to lay my head, to find myself... and let go.

Juan Tamad 
Feb 2011


16 February 2011

Berso at Litrato | Feb 17

     Alon...

     Kusa mang ibangon sa lusak...  
    Pagal na puso, sadyang kayhirap...  
    Isang butil na pangarap, ngayo'y nawasak...  
    Munting liwanag na pinawi ng ulap.

    Berso at Litrato 
   17 February 2011

I don't usually take photos of homeless people and beggars on street... i don't have anything against some street photographers doing it, but it's just not what I want them to be remembered in my photos. However rugged and pityful they may look now, but I'm sure they also have their share of hope and happiness, love and sorrows... they have lived their own lives. I just wish I could capture those moments for them, instead.

Still, I have to take a photo of this old woman. I was drawn by that look in her face... as if by looking at her, I was seeing her thoughts, her regrets, and hope... all passing by.


.

15 February 2011

Photo of the Day | Feb 16


Still Life ii

Still part of my experimentation in Still Life. I have dozens of similar shots that day, so I'm still looking for the right treatment to use for variations. Still need a lot of practice especially with the lighting. Might try again tomorrow with ambient light. I've already eaten these fruits, though. Lol.


14 February 2011

Photography Tips of The Week

10 Efficiency Tips for Digital Photographers (Part 2)


6. Shoot in RAW. The best way to capture all the range of colors and details of your subject is to shoot it in RAW file, not compressed jpg. It may be heavy on your memory cards and hard disks, but it gives a better result, if not best, out of your images. Unlike jpg, which are already compressed, the full color spectrum and the wide range of details and textures are still intact in your RAW files. So it's more vibrant and sharp. 

Of course, with RAW files, you may need a higher capacity memory cards and a software to open and process them. I use Lightroom 3 to edit my RAW images, but you can also use Photoshop (CS4-5), Aperture, and Digital Photo Professional (DPP) which is included in your camera installer CD. With RAW files, editing your photos is much easier and safer than jpg, with less risk of damaging your image and pixels.


7. Tell a Story. We all know that a photograph should tell a story, or evoke emotions from the viewer. Although we may not be able to achieve that in every shot that we take, we can still show it by simply framing our photos in the right progressive way. You can aim at telling the story by taking various shots of the subject and try to include the background or scene relevant to your story. Take wide angle shots, medium shots, vertical and horizontal shots, and close ups (shoot closer and look for details). In that way, you can tell the whole story in the collective of frames and images.


8. Find your Light. Photography is all about Light. Photographs are created with recorded light rays. The quality of our photos depends on how we choose, manipulate, control or exploit that light. It is what sets the moods and manifestations of our photographs. So be very careful in using it. Understanding your light and it's source is very essential in creating your masterpieces. (This topic is wide and more complexed, so we'll just discuss it further later)


If you're using natural light (sun), take advantage of the most convenient time of day to shoot. That is, 7-9 in the morning and 3-5 in the afternoon, where the sun's light is softer and angled low. If by chance you're shooting at midday where the light is harsh and above your subject, you can either use a diffuser and/or reflector, or simply put your subject on a shade. You can also position your subject where the light would be either on their side or at the back. Just add a fill light (flash or otherwise) or reflector to control the shadow and bring more light to your subject.


9. Keep your Focus. The quality of a photograph is based not only on its lighting and composition, but also on its focus. The viewer's eyes should be easily led to the subject and must be drawn into it much longer with its clarity and substance. That is to say, the focus on the subject must not only be compositional, but also technical. Sharpness and clarity aside, if your main subject is out of focus, then it doesn't qualify to be as such. It only makes it a part of the photograph.

There are means to achieve better focus with your cameras. The most efficient features are the AF focus and the AE lock. What I normally do, is set my AF focus to spot (single AF point) when shooting portrait, close up or macro, and architecture. Multiple AF focus when shooting landscapes and group shots. With the help of AE lock, I would first focus on my subject, shutter half-pressed, before re-composing my image. In doing so, proper focus and exposure are centered on my subject regardless of where they may be positioned in my photograph. (will also discuss selective focusing next time)


Aside from the AF focus and AE lock, it also helps to understand the metering modes of your camera. To compliment the AF focus in my exposures, I also use spot metering for my portraits and macros, and average metering on landscapes, architecture and group shots.


10. Back Up your Files! I had a very painful experience with this. I lost my 2009 & 2010 files when my 1 TB broke down. I'm still in the process of recovering them, and it doesn't look very promising. The most unfortunate thing is, 3 of my wedding coverages were also there, and it's been getting harder to explain and make excuses with the clients on when they can have their wedding photos. (arrggghhh!!!)

So learn from my experience, and don't just take my word for it. Just do it!. Right now, I maintain 2 separate hard disks for my files. The original files straight from the camera are saved on a 1TB, and the edited or processed photos and albums on a separate 500gb. Better protect your original files, they are more valubale than the edited ones.

While you're at it, try to manage your files, too. Separate your files in folders or albums. My set up is like this;

1. Original Files (RAW) on a separate HDD, sorted by date.
2. Photography Folder >
    a. Albums>
        >  Macro>
               >(Date or Location)>
                      > 1_Small    (reduced photos for posting)
                      > 2_Large    (hi-res large files, processed in Photoshop)
                      > 3_Raw      (original RAW file from camera or DPP)
                      > 4_Lightroom  (TIFF files processed in lightroom, before editing in Photoshop)

You can create your own filing system, what's important is to manage your files for easy access and storage.


Thanks a lot for the visits! Feel free to leave your comments and or suggestions. See you again for more basic Photography Tips next week!

13 February 2011

Photography Tips of The Week

 My Basic Tips for Digital Photographers

Since most of my friends are into photography, I decided to include helpful tips on my blog features. Every week I'll try to post some tips about digital photography here, although, I'm not a professional photographer (yet... ^_^), nor I have an expert opinion on things about the camera and photography. I just want to share what I have learned so far, from my personal experiences, books and magazines, from the works and words of the professionals, and from various resources on the web. Some of these tips would be from my own experiences, and some taken from other sources but in my own explanations.

Feel free to give comments, suggestions or corrections if ever you see something that seems not right. Thanks and Enjoy!


 10 Efficiency Tips for Digital Photographers (Part 1)


1. Shoot with steady Hands. Stable hands create better images. Avoid unnecessary blur or camera shakes. Keep your hands firm before shooting to avoid spoiling your shots. There are many ways and gadgets to keep your hand steady. You can use a tripod/monopod or place your camera on a sturdy object to help you balance and get rid of camera shakes, or lean on something like a wall, columns or posts, trees and other rigid objects. A normal person can hold their camera whithout shakes for a 1/30 secs shot, while others can do better up to 1 sec. Most lenses today have extra installed motors or features to balance the vibration of your camera, such as, Image Stabilizer (IS) for Canon, Optical Stabilizer (OS)for sigma, Vibration Reduction (VR) for nikon, and others. A simple practice in holding your breath while shooting may improve your takes. 

2. Choose your Shots, Don't Procrastinate! Just because you have more shots of your subject doesn't mean you have more quality images. They will just add burden to your hard disks and your time. Remember also that your camera shutter has its own life span (shutter life- approx. 60k-100k shots depending on the camera model) So limit your shots if you don't want to change your shutter every year.  

I normally take 3-5 shots of a scene or a subject in different angles and focal lengths. That's moderate enough for me. Remember to stop and weed out unwanted, blurred, or bad shots from your memory cards while shooting and before downloading them to your computer. It will be easier to organize your files later on.  You don't want to spend more time on the computer editing the same images of the same subject over and over again. Just remember also to format your memory cards after downloading to computer to minimize bad sectors and file residues.

3. Use Efficient Memory Cards. There are dozens of memory cards and sticks on the market, but not every one are best suited for digital photography. Regardless of brand and model, the most important are the capacity and speed. Although more expensive, try using the hi-speed cards that would enable you to shoot without delay. Multiple 4 gb cards, if your shooting jpg format, or 8 gb cards if your shooting raw format, are better than using single high capacity cards (8gb for jpg, 16gb for raw), storing all your shots in one card. It will only bring you headaches if your card experienced trouble while shooting or malfunctioned while downloading. In shooting with different cards, you can be sure to have safe back up of your shots during that day. This is more practical if you're shooting events, like weddings or parties, where you don't get another chance to re-create the scenes once your card gets busted.

4. Don't Share your Memory Cards. Although I sometimes do, better not share your memory cards while in a shoot with other fotogs, you'll only have trouble sorting out your photos from theirs. I have an old 1gb card that I usually share if needed, but not my normal cards. For one, you need all the disk space for your own shots. And then, it would be uncomfortable for both parties to retrieve their shots quickly, unless you have a card reader or laptop on site. It would also save you from hidden bugs and further errors from cam to cam, or card to card.

5. Shoot as a Photographer not as a Photoshop artist! Plan your shots well so as not to overtaxed your images in Photoshop. A lot of newbies and hobbyists tend to rely more on the magic of retouching or editing their photos in Photoshop or other softwares, than having the discipline to take better images as a photographer. It may be convenient to edit your mistakes or flaws in photoshop, but it is not an efficient result, personally, as a photographer. Specially if you're doing a professional or commissioned work, you cannot tell your client that you're just gonna edit the flaws in your photos with photoshop later on. You're only as good as your last work. So treat every shot as your best. Take your time, and put more effort on every shot, and not to rely much on editing. 

Off course, since it is a digital image, there is the need to use softwares and conversions. And more and more applications and enhancements are getting easily available nowadays to make your images even better. I myself, am experimenting on many of those. But my point here, is to  rely first on your skills as a photographer, and not on what softwares can do to correct your mistakes and flaws. Just treat them as they should be, enhancements to your already good captures.

( to be continued...)  


Photo of the Day | Feb 13


Still Life
It's been years since I had my last Still Life shoot, back in my film days. I decided to take another try for this year. Although it would take time for me again to get the right lighting and compo. This will be my new project for 2011. When I got back in photography in 2008, after a 6 year hiatus, I started re-learning my basics in landscapes and macro, then Portraiture last year. This year will be all about still life, food and product photography. 

Of course I would still shoot the other stuffs given a chance. There's just no subject for me more complicated and arduous than still life and products, especially in lighting. Will just have to put more effort on it.

So Expect more of this kind of images from me this year. Enjoy!


09 February 2011

BINONDO PHOTOWALK Part 2 : THE TREASURES


CHINESE LUNAR YEAR CELEBRATION 2011
Chinatown, Binondo, Manila
3 February 2011


Treasures on the Street.  Even on ordinary days, Binondo area is bustling with trades and buyers. From gold and silver jewelries, chinawares, appliance, electronics, and even construction materials. It's a one-stop destination for affordable retail and wholesale merchandise.
During special days such as the Chinese New Year, the street is even more livelier due to the number of street hawkers and peddlers. With all types of western and oriental food, fruits, antiques, lucky charms, jades and stones, and more. The colorful sight and the happy faces are more than enough reason for a good street shoot.
Binondo photowalk...


little gourds..


It's raining bunnies & hares!!!  It's the Year of the Rabbit, once again! As the Lunar Year of the Metal Rabbit approaches, hundreds of rabbit merchandise can bee seen in every corner, not just in Chinese communities and establishments. In Binondo, our lenses feasted on the various items being sold by the peddlers on makeshift tables and hangers. Along with other lucky charms and jewelries, you can see different types of rabbit figurines and toys. I had a blast snapping them all, rubbing elbows with enthusiastic buyers and curious onlookers. Some vendors would graciously smile and pose with their items, while others would just give me a startled look and stern gaze. Can't blame them, though... I wasn't buying anything. lol


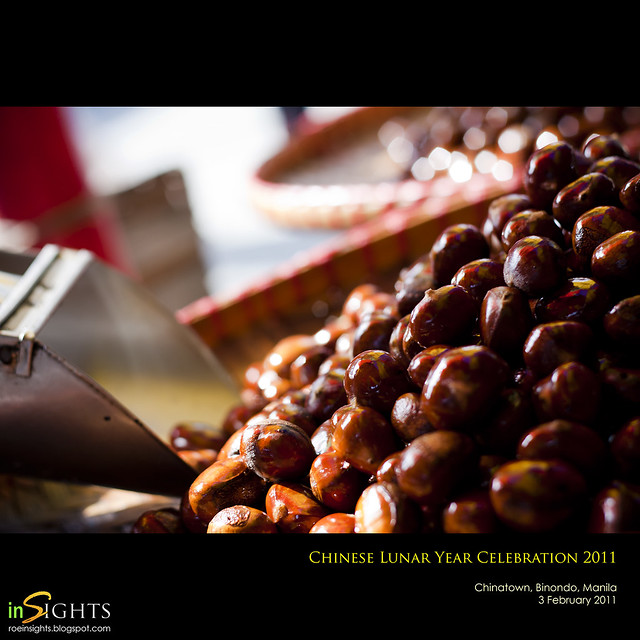
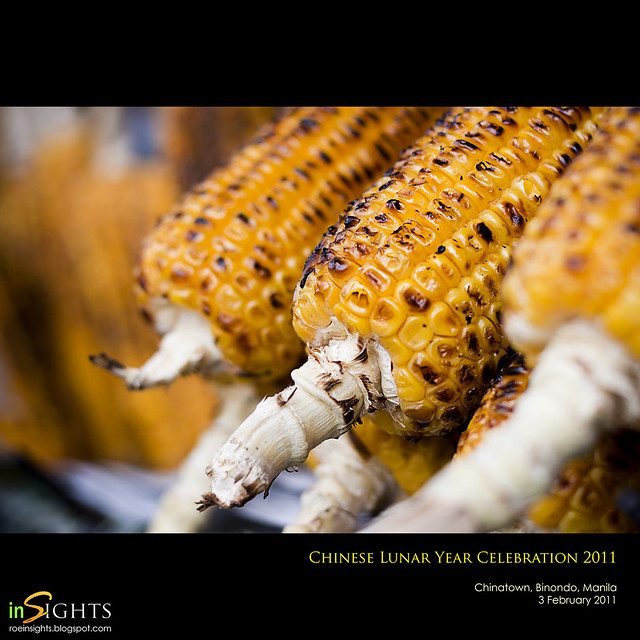
The usual treats!  On normal days, you can still find the usual food and fruit stands along the streets. My routine buys everytime I go to Binondo are fried siopao, hopia, chinese sausage, and fruits... topped with chinese cuisine, specially noodles and dimsums for lunch. Occasionaly, I would go there to purchase materials for my projects. You can also find roasted chestnuts and coffee beans, grilled corns, barbecues, and local pastries even on ordinary days.


Roasted Chestnuts...

Grilled Sweet Corn...


More of my captures during that day.


Next:
BINONDO PHOTOWALK Part 3 : THE PEOPLE & PLACES

LINKS:
You can also view my other photos and works here:

My Facebook Albums 

My Flickr Photostream


04 February 2011

BINONDO PHOTOWALK Part 1 : THE CELEBRATION

CHINESE LUNAR YEAR CELEBRATION 2001
Chinatown, Binondo, Manila, NCR, Philippines
3 February 2001 

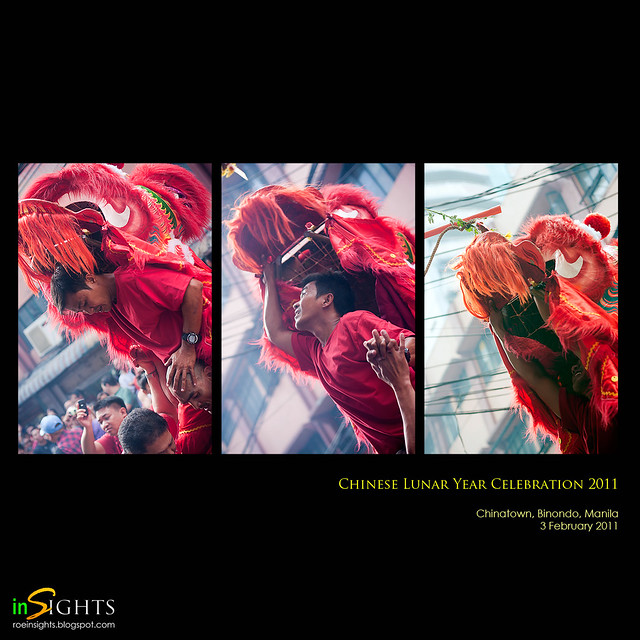
 dragon dance...

Last Thursday, February 3, a few friends and I had a photowalk in Manila Chinatown, or what is mostly known today as Binondo, in the port district just a few blocks from the Old Intramuros. It was a day of prosperity and new hope for our Fil-Chinese friends and families, and a great opportunity for us to capture some photos.

As hordes of people gather to celebrate the coming of the Year of the Rabbit, we were busy hopping and clicking, jumping from one subject to another. Some folks went there for the festivities and tradition, others to huggle and bargain, while a few just passed by from work to enjoy the merrymaking. But what I found amusing, is that, a good percentage of the crowd are all carrying a camera. From  various phone & digital cameras, to film SLRs, and the current favourite accessory of Pinoys, the DSLRs. Now there goes my dream of capturing a good image where only I would have hoped of had taken. Most probably, the photos that I post today will have dozens of cousins and neighbors in a weeks time. 

But it doesn't matter anyway. I had a great time, took a few decent shots, and had indulged myself, once again, to a delicious meal from my favourite Chinese restaurant, Wai Ying, with my usual roasted duck mami, with chicken feet & beancurd roll dimsum. Now, that's a welcome trade off to the 7-hour walk that we had that day.


dragon dance...

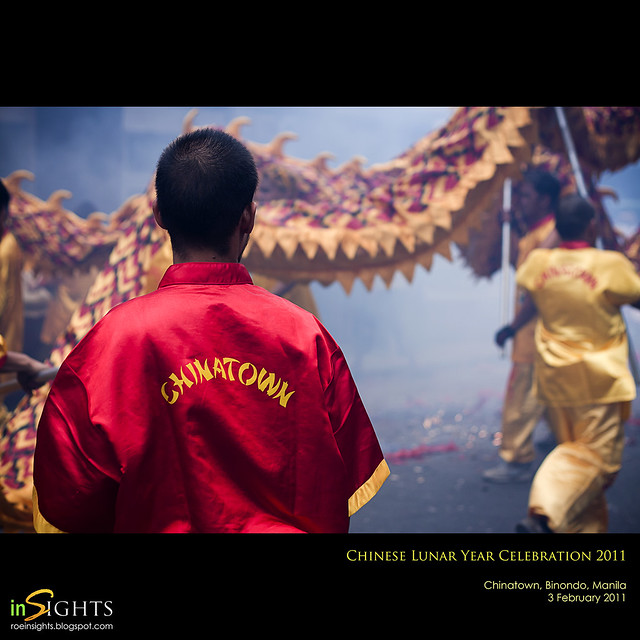
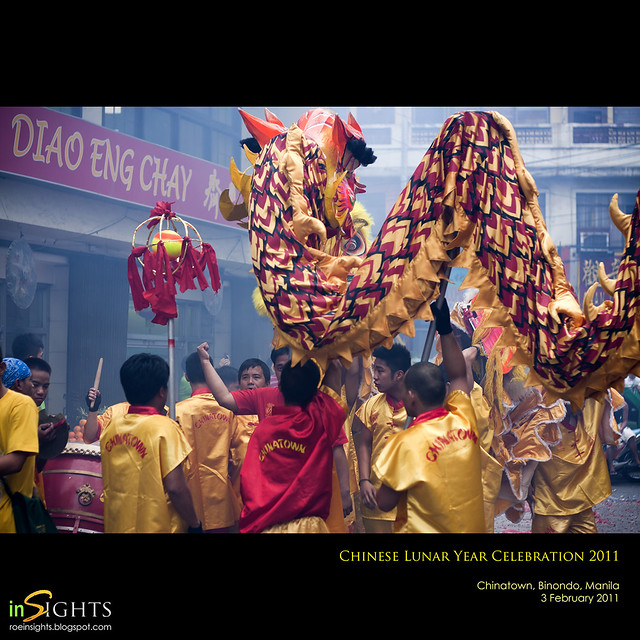
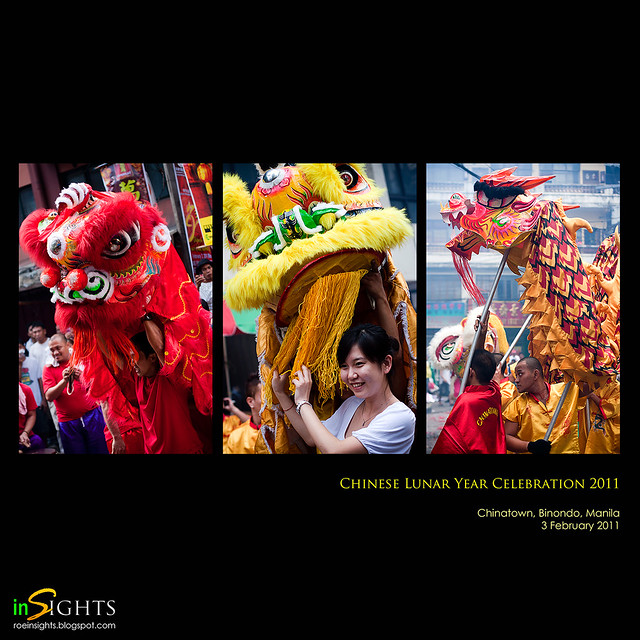
The most anticipated event in every Chinese celebration such as this, is the dragon dance. I don't know the complete facts or history behind it because I'm no expert regarding this. I Just know that it's a belief to ward off evil spirits and unlucky vibes, and to hope for more prosperous and healthy year. This performance is usually topped off with fireworks, lots of them...and loud, too!  I know, because I can still hear some ringing in my ear from all those Judas Belts. This performance is usually commisioned by establishments and other households to usher goodluck and prosperity to either business or family.


dragon dance...

Normally, after the "Dragon's" performance, they would enter the establishment for a final ritual of blessings and "gift-givings". But sometimes, they would hang a garland or packets above any door or threshold, and the dragon must catch it with it's mouth, and gets the reward.


dragon dance...

For us, photographers, it's always an exciting treat to snap these kind of festivities with vibrant colors and vigorous activites. Where our minds and fingers are racing to get that perfect shot. But it's also thrilling and exciting for normal folks to throw themselves in and have their pictures taken, thus, maybe ruining your shot. But I don't mind, really...they make a welcome subject for me. Even better if It gets me the chance to capture a lovely lady like her.


Later after lunch, while some people were being entertained by celebrities and musicians in a concert in front of Binondo Church, we chanced upon the motorcade of the Fil-Chinese community, led by some of the local officials and politicians. There were bands, princesses and muses, floats of families, actors, celebrities, representatives from different schools, organizations and chambers of commerce, business establishments, and lots of candies being thrown into the crowd.


More photos of our photowalk are found in my FB account, but before that, I would like to give my sincere admiration and gratitude to the volunteer fire brigade of our country. I won't get into too much detail, but just know that we are forever indebted to your bravery and self-sacrifice. I especially admire the Fil-Chinese Volunteers from Binondo and other parts of Manila, and would like to post some photos for them.


Next:
BINONDO PHOTOWALK Part 2 : TREASURES

LINKS:

To see more photos from this photowalk, please visit my facebook album.

or
To see more of my other works, please visit  my flickr photostream


Related Posts Plugin for WordPress, Blogger...